As promised, I wanted to share with you something I've affectionately dubbed my magnetic "Life Board." A few years ago I wanted to create an easy spot in my home to post photos and memorabilia. My plan was to have a giant magnetic board ~ a place I could throw pictures on ~ an ever evolving record of our lives. To accomplish this, I installed two sheets of galvanized metal in this little pass through hallway. It provides a convenient landing place to feature treasured keepsakes. In addition to holding photos, it also displays various notes, postcards and other miscellaneous objects.
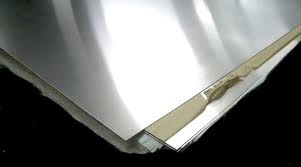
To begin with, I contacted a local metal manufacturing facility. They offered sheets of metal similar to the ones pictured
above. I measured the area of the hallway wall and gave them the dimensions. They cut the metal to perfectly fit the size of my space.
For a small fee, I had the vendor wrap the edges* of the sheet metal (fold them over). Otherwise, the material is sharp and difficult to handle.
I attached the sheet metal to the wall with sheet metal screws ~ albeit they were longer than the ones above. Fortunately, I was able to hit the studs in the wall. If I hadn't, I would have used anchors for added security.
This space morphs from day to day. It is always being added to and changing ~ following is a little sampling of some of the keepsakes:
A vast majority of the board contains photos like these: 1. Gavin a.k.a. a "tiger" in Kindergarten ~ so cute. 2. Buster's dog tag. 3. Me, Nat and friends at Pike Place Market Gum Wall in Seattle ~ kind of gross but we had to do it. 4. Buster Dog ~ loved and missed. 5. A vintage Donald Duck key chain. 6. A treasured handwritten note from Reagan. ;)
It also holds some very meaningful remembrances: 1. A poem Papa wrote for Nana entitled, "The Rose." He had it printed up on a satin ribbon and gave them to all the family the last Christmas before he passed. He had lovingly written on the envelope: "When I first saw my 'wife to be,' at once I became a poet." It still brings on the tears every time I read it. 2. A photo from a family gathering. 3. A postcard from a hotel we stayed at in Venice.
Some more of the same: 1. A concert pass from a Sade concert I recently attended ~ a phenomenal concert. 2. Corbin and Reagan in younger years ~ I love those guys. 3. Nana, Reagan and Nate several years ago ~ it's still hard to believe she's gone.
And finally, one of my personal favorites: A bowling score sheet ~ as the only female in the family, I bowled the best game. I gloat a little here ~ only because that's probably the first and last time that will ever happen in my lifetime. :)
Although, there are a few special framed photos in and around the house ~ this giant magnetic board is the centralized focus for most of our pics. This project was simple to do and was cost effective (it set me back less than $50.00) ~ and would be an easy weekend project. Especially, when you have a long weekend coming up like Labor Day. I hope you have an enjoyable one!


Do you know what gauge of sheet metal was used for your magnet wall? I'm looking to do the same think on one our walls. Thanks!
ReplyDeleteI'm not sure where you are getting your metal... but to get a 4' x 8' piece of sheet metal from my "local metal manufacturing facility, with wrapped edges, cost me close to $300. For me it was worth it, as I have a huge magnet collection to display, but $50 is a *steal* (or...steel? hahahaha...)
ReplyDeleteWow ~ what size of a space were you trying to cover? I just did another install of this a couple of weeks ago for a client and the total for two sheets was only $65.00 plus tax. I hope you were able to find a supplier with better prices. Nonetheless, I bet your project turned out awesome!
Delete:) Dana
Could you tell me how you put the two edges of the two pieces of metal together? The pictures seem like you overlapped the edges and then only used one screw down the seam??
ReplyDeleteHi Shanda ~ Actually for this installation, it was one big piece of sheet metal. I just ran a row of screws down the middle so it wouldn't buckle on me. Here's the link to another post where I used two pieces of sheet metal: http://tatteredstyle.blogspot.com/2011/07/x2vol-office-space-part-i.html. I butted them together as close as possible. If you look closely you will be able to see the two rows of screws. Hope this helps.
Delete:) Dana
Not nearly as attractive, but those trying to not spend much and not cover a wall - go to the automotive section of your big box store and purchase for less than $12 a large metal oil drip pan.
ReplyDeleteHello, I was wanting to do this in my daughters room. Do you know the gauge of the metal you used?
ReplyDeleteThanks, Jonelle