Showing posts with label DIY Project. Show all posts

Thursday, August 15, 2013

BINGO ~ Marker Magnets + Electrical Panel Magnet Board


I'm currently in the process of converting the garage space into my office/studio.  One necessary evil I'm having to deal with is the unsightly electrical panel.  Instead of trying to hide it, I decided why not use it to my advantage as a magnet board.  It gave me the perfect excuse to pull out the vintage bingo markers my hubby gave me as part of a Valentine's gift several years ago.  I've been holding out ~ knowing someday they would be of use.  


The bingo magnets were easy to make.  I simply glued magnets (you can find them here) to the back of the bingo markers with E6000.  I let them glue dry overnight before using them.


You may have noticed the not-so-tidy paint job around the panel door ~ no worries ~ the whole room is in the process of a makeover.  I'm so excited about my creative space!

Oh, and if you are interested you can see another magnet project I did here ~ using leftover foreign coins.  Now I have two sets of magnets with a story.  :)

XO ~ Dana

Tuesday, April 24, 2012

Can Do Candles / DIY


Don't you just hate it when the wick of a candle burns down long before the wax is used up?  Here's a clever way to help make your favorite candle last a little while longer.  I borrowed the idea from my friend, Julie.  One evening while I was at her house, I noticed she had a candle sitting in a pan of water on the stove.  The candle had burned down to the point to where the wick was too short to light.  However, there was still leftover candle wax.  By melting the candle on the stove in a pan of warm water, the scent of the candle continued to fill the room. 

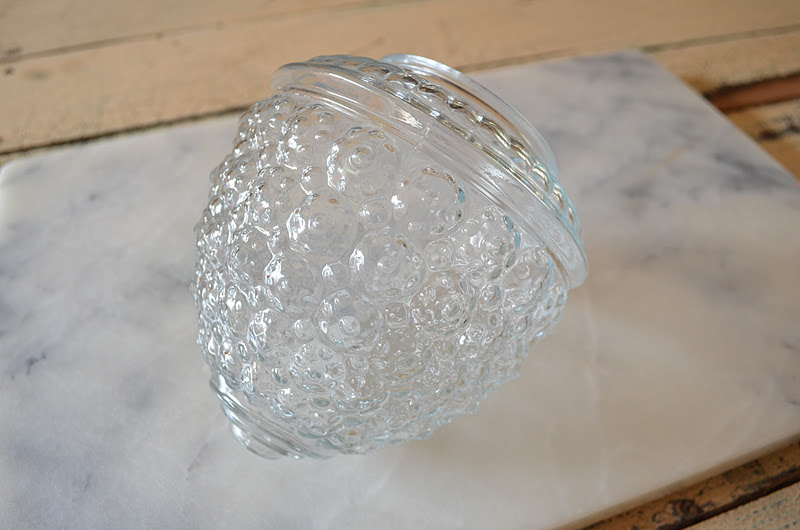
I carried Julie's idea one step further creating a "new" candle by adding purchased wick to the leftover wax.  The above candle is actually the leftover wax from three different containers of my favorite candle ~ the best candle on the planet!  Find it here.    
 
Below is a list of supplies needed to complete this project:

Used Candle (one with the wick burned down)
Saucepan
Oven Mitt
Candle Wicks
Empty Container (Clean ~ glass or metal)
Bowl
Ice Cubes/Water
Scissors


For example purposes, I chose to remelt a candle that Gavin (my youngest) gave me for Christmas.  This time, I only had one candle to melt down so I chose a small pewter container (I had on hand) to become the new container for my candle.


First, I filled a saucepan with water, so it came up to the middle of the candle I was wanting to melt down.  I then placed the candle in the water and turned the heat to medium high. 


As the water heated and the candle started to melt a bit, I turned the heat down to low and allowed time for the candle to melt completely.


For this project, I used candle wick I bought at Michael's ~ they come in a variety of lengths.  I opted to purchase the longest ones they had so they would work for various size candles.  


I positioned the wick so it was centered onto the bottom of the container.


Using the oven mitt, I poured the melted wax into the container.  Be careful...it's HOT!


I then placed the pewter cup into a bowl of cold water to which I added ice cubes. 


This helps speed up the process of hardening the wax (I can be a little impatient at times).


After the wax was completely hardened, I trimmed the wick back to about 1/4". 


Now there's no reason for disappointment when your favorite candle burns down.  This is a simple and easy little project you can do to assure you enjoy a candle until it's all used up.  I hope you give it a try.

On another note, thanks to HGTV.com for featuring one of Tattered Style's ideas.  Check it out here.  You will need to scroll through ~ it's # 9 of 13 photos (Rustic Wine Glass Holder).  I hope you have a lovely week ~ thanks for stopping by.  :)

Thursday, April 12, 2012

Framed and Fabulous


This colorful oil painting was just what the doctor ordered for a client's pre-teen girl's room.   When I saw it at a thrift store I quickly snatched it up.


The frame it was in was absolutely lacking on every level.  But a good scrub, a new coat of spray paint and some funky ribbon was all it needed to bring it up to speed. 


I used Krylon Fusion in Ivy Leaf to add some flirty fun and give the painting a good dose of youthfulness.  The color ties in perfectly with the girls room I prepared this for.  I always spray the item I'm painting with several light coats of paint versus heavy coats ~ this prevents drips and paint runs. 


After the frame dried thoroughly, I decided to embellish the inset part of the frame with some funky green and white ribbon. 


I cut the ribbon to the desired lengths (cutting the ends on a 45 degree angle so they would lay nicely on the inset of the frame).  


Next, I sprayed the backside of the ribbon with 3M Super 77 Spray Adhesive.  I gave each piece of ribbon an ample coat of adhesive and waited a couple of minutes before I positioned the ribbon on the front side of the frame.

 
In this case, 5/8" ribbon fit the inlay perfectly.  I like the way it brings out the white in the oil painting. 


Lastly, I placed the oil painting back into the frame and attached it permanently with 4 ~ 1/4" metal offset clips.  They work like a charm. 


I screwed them into place on the frame at four points (there's no need to attach any to the back of the painting as the clips hold it securely in place where they are screwed into the frame).  


After covering the back of the painting with brown paper, I attached two screw eyes (1/3 the way down from the top side of the frame ~ on the left and ride sides) and then strung a piece of picture frame wire between the two.


For now, this painting is waiting to be installed in a young girl's room.  I'm headed over today to do just that.  Please check out my Facebook Page for upcoming photos of how the installation turns out.  I hope you have a relaxing weekend.  :)  Dana

Monday, November 7, 2011

Springs Have Sprung


I don't usually go all out for holiday decor.  Instead, I like to add a few simple touches to create a little seasonal ambiance.  This Thanksgiving, I decided to use some old bed springs, to convey a sentiment of thankfulness. 


I started out with some salvaged bed springs that were taken from an old bed frame ~ I found it on a trash heap at a house my friend was demoing.  All I had to do was cut the springs off of the bed frame with some tin snips.  Here they are after they've been removed ~ I also love the way they look, casually tossed in a bowl. 


 For this easy project, in addition to the bed springs, all you need are:  
  • Paper Key Tags
  • Rubber Stamps
  • Ink Pad (color of your choice)

I found it much easier to stamp the letters on the key tag, if you remove the metal jump ring first, then reattach the ring to the tag once you are finished.


    After this step, all you have to do is "thread" the tag onto the coil of the bed spring and, "Voila!"~ you are finished.


    ~ A quick way to create a little holiday decor or add a word of sentiment to any event or setting ~


    I love these funky, old, rusty bed springs and the way they add a touch of "Thanksgiving" to this vignette in the dining room.  Be watching for more holiday tips and tricks throughout November and December.  Hoping you have a great week!

    Linking up today:  

    Tip Junkie handmade projects

    Friday, October 14, 2011

    Yellow + Black + Metal


    A favorite vignette of mine is pictured above.  It includes random treasured finds which are unified by color and texture.  I'm choosing to use the large "&" sign as the number "3" instead ~ meaningful to me because of my three sons.  An aged chicken feeder stands ~ propped on its end. 


    The weathered Texas license plate is elevated to new heights atop this vintage store price display stand.  I think this is the easiest "project" I've ever done.  Luckily, the tag and the stand had the same dimensions.  So all I had to do was wire the tag to the opening of the stand.  How's that for the world's easiest DIY project?


     I consider the Remington Portable a work of art in itself.


    Don't you think the typewriter keys are exquisite?  I also have a treasured necklace made from an old typewriter key ~ but I don't think I could ever bring myself to dismantle this tired old machine.  If you would like, you can read more about the metal 2 and 6 here.


    As with most things, I acquired these pieces over time.  It's always fun to see how they will all eventually come together.  I think this grouping of industrial items works ~ they are all tied by color and texture. Yellow + Black + Metal = that's all for today!  I would love to hear about a favorite vignette in your home ~ have a wonderful weekend!

    Tuesday, October 11, 2011

    DIY ~ Hanging Candle Holders

    Here's a simple project anyone can do.  I was inspired to get creative with several old discarded ceiling fixture globes.  These inexpensive globes are often used by builders for ceiling fixtures in bathrooms and in hallways.  I thought the pressed glass was just too pretty to let go of.  I decided to repurpose them as hanging candle holders.  Here's what you will need for this easy DIY project.


    ~ Globes from an old light fixture ~ 

    If you don't have any old ones laying around, they can easily be found at thrift stores for about a dollar.


    Wire
    Wire Cutters
    Needle Nose Pliers


    First, I determined how long I wanted the finished length of the hanging holder to be.  I used wire cutters to cut a length of 16 gauge wire for each globe plus an additional 6 - 8 inches to allow for twisting on the ends.  I used varying lengths of wire for each globe so they would differ in height.  I bent the wire at the midpoint of the long piece of wire and formed a loop (see above) this will be what the holder hangs from.  


    Next, using needle nose pliers, I twisted another piece of wire around the neck of the globe (globe wire).  I slipped the hanging wire onto the globe wire (see above) and twisted the ends of all the wires until snug.  And that's it ~ you are finished!     


    I chose to hang the globes from a vintage I.V. pole that I already owned.  I placed tea lights inside of each globe ~ and when they are lit they create the prettiest flickering patterns on the wall in the evening.


    Here they are hanging in the corner of my sitting room.  These hanging candle holders could also be hung from hooks or on a nail ~ depending on where and how you would like to use them.  I also think they would make a charming exterior light treatment for an outdoor party ~ wouldn't they be festive hanging from tree branches?  Additionally, this could be used as a clever idea for an outdoor wedding feature.  Happy Tuesday ~ I hope you have a terrific week. 

    Friday, June 10, 2011

    Anthropologie Inspired


    Pretty!!!  Wouldn't you agree?

    Inspired by Anthropologie's Dawning Lark Bed, this old wrought iron screen door that a friend of mine gave me, has been reinvented as a headboard.  Although it's not symmetrical, I still think that when turned horizontal, it resembles and has the same feel as the one at Anthro. The scrollwork helps in mimicking the bed I was inspired by.  


    It required sandblasting and powder coating but the cost still came in way under the price of the bed at Anthropologie.  I had the work done at a local body shop ~ the $150.00 I spent for the makeover was a lot easier to swallow compared to the $2000.00 sticker of the Dawning Lark Bed.

    Notice the panel on the right side of the headboard ~ it works out perfectly as a magnetic board for small photos.


    Since the headboard doesn't have siderails and a footboard, I attached the screen door directly to the wall (making sure to locate the studs for needed support).  The end result ~ I'm inspired!

    Have a good weekend ~ :)
    Related Posts Plugin for WordPress, Blogger...